How To Do Hat Machine Embroidery The Easy Way

- November 15, 2024
- By SEO
- 359
- Uncategorized
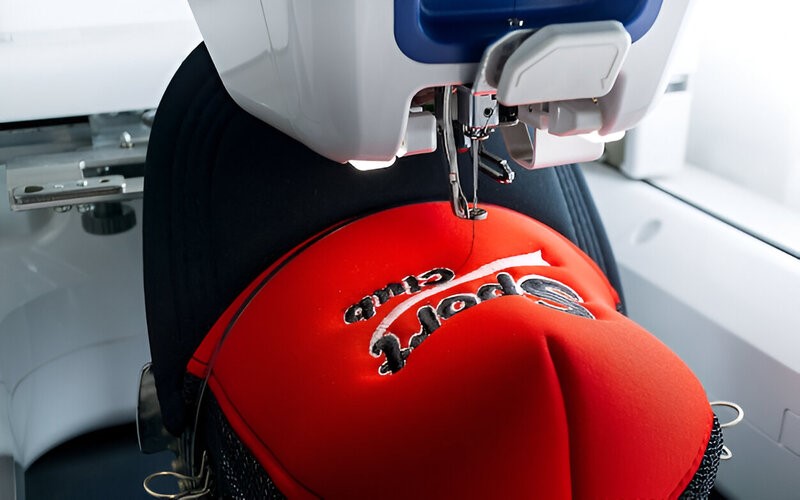
Embroidering on a machine can be a great pastime and hobby if you are someone creative and love customizing your accessories and clothes. An embroidery machine can be your perfect partner in this journey by bringing your designs to life. However, as a beginner, this task may seem pretty challenging, especially if you are thinking of embroidering on a hat. Hat machine embroidery isn’t difficult at all once you know the material you need, the steps you need to follow and what techniques to use. Here is how you can achieve a professional-looking embroidered hat with the help of a machine.
Why Use Hat Machine Embroidery?
Personalizing your accessories including your hat makes for a perfect item to gift to someone special or even to sell. Embroidering hats and customizing them with the help of a custom embroidery digitizing service can let you make multiple promotional hats for various events. Further, they can be considered as an essential product for embroidery shops as they feature brand logos, names and custom designs that offer high visibility.
As much as hat embroidery is a great hobby and business start-up idea it is also important for us to acknowledge that the curved surface of a hat serves as a challenge when it comes to machine embroidery. For this exact reason, you must know the ins and outs of the hat embroidery process so that you can avoid making unnecessary mistakes and save time.
Things You Will Need For Hat Machine Embroidery
Before we get into the how-to-do hat machine embroidery process it is important to know what materials and things you will require to get to the next step. The list of things that you should have prepared for embroidering a hat is as follows:
- Embroidery Machine: Make sure that the embroidery machine that you have can embroider on hats/caps. We would recommend using machines such as Bernia 700 or Brother PE800 for hat embroidery as it is well equipped with the necessary hoops and attachments for the task.
- Hat Hoop: This is a key component in stitching as it helps hold the hat securely while the machine embroiders or stitches on the design.
- Stabilizer: This helps prevent shifting and puckering while you are stitching. With the help of a cutaway stabilizer for hats, you can have additional support for the fabric and hold it up while you continue to stitch on it.
- Thread and Needle: You cannot embroider or stitch without thread and needle. Use a good quality embroidery thread to ensure that your end product looks sharp and vibrant. Further, embroidery-specific needles such as 80/12 are recommended for stitching on a hat.
- Hat: The type of hat or cap you are embroidering on decides design placement and the style it will have. Usually, standard baseball caps, beanies and trucker hats are preferred for embroidery. So for your first hat embroidery, you should try out one of these.
- Cap digitizing software: To help convert your artwork or design into a format that you can easily embroider with the help of the embroidery machine, you will need a digitizing software.
The Step-by-Step Guide To Hat Machine Embroidery
With your tools ready, you will have to go through the following procedure:
Step 1 – Prepare the Hat and Hoop
This step involves choosing the right to get to work on. To do this make sure it fits your machine’s embroidering capabilities, by checking if it can fit your machine’s hoop and accommodate the shape and size of the hat you have selected. Once this has been done, you should place the hat on the hat hoop to make sure that the cap is centered properly and its front panels are flat against the frame. Further, align the sweatband area to the button of the frame to have it snugly fit into the frame. Then proceed to apply the cutaway stabilizer behind the hat’s fabric. This way you will be providing structure to the design and making sure it stitches on perfectly without pulling or puckering the fabric. Lastly, to complete this step tighten the frame on the hat to make sure it is secure but not too tight as it could distort the design. Also, make sure that the area of the hat that needs to be stitched on is free of wrinkles.
Step 2 – Set Up the Machine
Once you have prepared the hat and hoop, it’s time to set up the machine, for this select the right needle and thread and load it onto your machine. After having done that, you should load your designs onto your embroidery machine through the software or USB. Ensure that the design is properly digitized and fits with the hat hoop or caps frame. Then with the help of the machine’s software position the design onto the hat’s front panel and is centered and properly aligned. Finally, before getting to stitching also avail of your machine’s preview feature to ensure that the placement is correct.
Step 3 – Get Embroidering
With everything in place and having been set up properly, it is time you started hat machine embroidery. Although, better advice would be that before you get to work on the actual hat, you should test out the embroidery on a similar piece of fabric to test out the placement and overall look of the design. Once having checked that everything is good to go, you should begin the stitching process on the actual hat and be a little careful initially to ensure that everything runs smoothly. If you are running into any issues such as fabric shifting or thread breakage, make sure to sort them out. As the embroidery process progresses make sure to trim excess thread either manually or with the help of the thread trimmer on your machine to get a cleaner look.
Step 4 – Finishing Touches
Finally, once the embroidery process has been completed on the hat, carefully remove the hat from the hoop, you should be extra careful during this process to avoid causing any damage to the embroidered design. Once this has been done, trim the excess stabilizer however, make sure not to trim realizing close to the stitches. Then, you should proceed to iron the hat with a hat press or steam iron to smooth out the design. However again you should be extra careful so as you do not cause the material to get distorted or shrink due to the heat. With all the hard work done, you shall now have your very own customized design brought to life with the help of hat machine embroidery, and have a closer inspection if the color grading and overall stitches are intact. Once entirely satisfied, your hat will be ready for wearing or selling!
Conclusion
Hat machine embroidery is not at all difficult if you know what you are doing and have all the right material. All you need is a little faith, a good guide and a cap digitizing service to assist you on this journey.
RELATED BLOGS

Halloween Costume Guide: Everything You Need toKnow
With autumn approaching, it is now the perfect time for you to be planning out your Halloween costume. This is the perfect.

The Art of Embroidery Digitizing and Vector Artwork
The world of design has evolved a lot, especially in the last two decades. This is because of the integration of modern.

