Logo Digitizing Process: A 2026 Step By Step Walkthrough
You sent a logo. The shop sent back a polo with thread breaks and fuzzy letters. Sound familiar? Most cap and apparel orders go sideways for one reason. The logo digitizing process behind that file was rushed or done by software alone. A clean stitch file is not the same as a clean logo image. It needs hand work. The file needs fabric math too. A sample test must run before it ships.
Quick Answer at a Glance
The logo digitizing process turns a flat image like a JPG, PNG, or vector file into a stitch file an embroidery machine can read. At USA Digitizing Pro the workflow has six core stages. Artwork intake. Design audit. Manual digitizing on a studio workstation. Two machine sample test. Format conversion. File delivery. Standard turnaround is 2 to 4 hours for logos under 10,000 stitches and same business day if your order lands before 3 pm Central Time.
What Logo Digitizing Actually Means
A common myth is that you upload a logo and the machine just stitches it. That isn’t how embroidery works. The machine reads coordinates and stitch type calls. Your logo image has none of that. The conversion step is the bridge. It takes the shapes and colors you sent and translates them into thousands of needle drops the machine can run. Each stitch is hand placed by a digitizer. Every color gets assigned a thread number. The fabric type sets its own pull compensation math. The output is not an image file at all. It’s a coded stitch path. Files end in DST for Tajima machines, PES for Brother, JEF for Janome, EXP for Melco, VP3 for Husqvarna, XXX for Singer, and HUS for older Husqvarna setups.
Our 6-Step Digitizing Process
Step 1: Send Your Artwork the Right Way
Step 2: Design Audit and Stitch Plan
Step 3: Manual Digitizing on the Studio Workstation
Step 4: Two Machine Sample Test
Step 5: Format Conversion to Your Machine Code
Step 6: Delivery and Your Quality Promise
Step 1: Send Your Artwork the Right Way
The first phone call we get from new buyers is usually about format. People think they need vector art before they even ask for a quote. The truth is, we accept JPG, PNG, PDF, AI, EPS, SVG, and even hand drawn sketches scanned at home. The cleaner your input is, the faster your file ships. So a high resolution PNG with a transparent background runs faster than a 72 dpi JPG pulled from a website. A vector AI file with named layers runs fastest of all.
Vector versus raster
Vector files (AI, EPS, SVG, PDF) are made of paths. They scale to any size without going blurry. Raster files (JPG, PNG, BMP) are made of pixels. Blow them up and they pixelate. We can work with both. Vector is just faster to digitize because the edges are already clean.
Color codes you’ll want to share
If your brand uses Pantone Matching System (PMS) numbers or specific Madeira or Isacord thread codes, attach a short note with the file. We’ll match the closest thread on hand and confirm before stitching. If you skip this, our digitizer picks the nearest match by eye, which is good but not exact.
Step 2: Design Audit and Stitch Plan
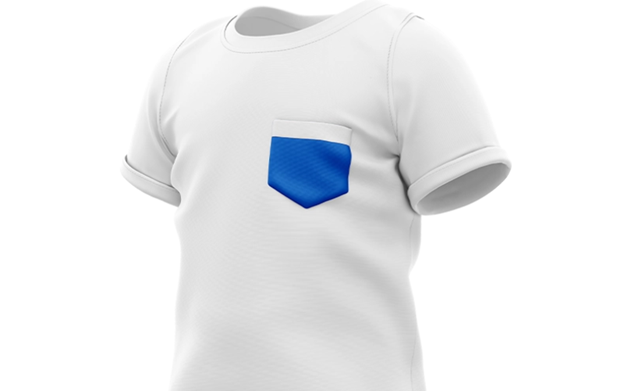
Once your file lands in the studio inbox, a senior digitizer opens it and runs an audit. Three things get checked in this minute. Size, detail, and color count. A logo headed to a left chest polo will be around 3 to 4 inches wide. A back of jacket print can run 10 to 12 inches. The chosen size sets every other decision below it.
Detail is the next check. Lines thinner than 1.2 mm rarely stitch out cleanly at a small size. Tiny text under 5 mm tall risks turning into a thread blob. If the artwork has these issues, our digitizer will email you a flag and a fix suggestion. We never just hide a problem and ship.
Color count matters too. Most embroidery machines hold 8 to 15 thread spools at once. If your logo uses 12 colors, the machine has to stop and switch spools mid run. That doubles the production time. We sometimes recommend a simplified palette that keeps the look and trims the stitch time. The call is yours. We just lay out the options.
Step 3: Manual Digitizing on the Studio Workstation
This is where the actual work happens. A trained digitizer opens the design in studio grade software (Wilcom or Hatch in our case) and starts placing stitches by hand.
Why we skip auto digitizing
Auto digitize buttons exist in almost every software package. They look great on screen and fail on fabric. The auto tool guesses. It picks the same density for cotton as for nylon. Satin stitches end up running across curves that should be fills. Underlay drops out completely. The result looks fine on the preview and pulls apart on the polo. Our team places every stitch by hand for that reason.
Push and pull compensation
Embroidery thread pulls fabric inward as it stitches. Cotton pulls more than canvas. Knit beanies pull more than woven caps. A skilled digitizer adds a few extra thousandths of an inch to each shape to cancel that pull. The output then stitches the size you wanted, not a shrunken version of it. This is the single biggest reason a manually digitized logo looks crisp and an auto digitized one looks fuzzy.
Stitch type choices
Satin stitches give clean shiny edges. Fills cover wide solid areas. Run stitches act as outlines. Tatami fills break up large areas to prevent puckering. A clean file mixes all four based on the shape. Our digitizer also sets the entry and exit point of each shape to keep trims low. Fewer trims means fewer thread breaks at the production stitch out.
Step 4: Two Machine Sample Test
This step is the one most low cost services skip. After the file is built, we run it on two studio sample machines on a cotton swatch and a polyester swatch. Both swatches come back to the digitizer.
What we look for in the sample. Trim count. Color sequence. Registration drift between letters. Thread tension behavior on dense fills. Any sign of puckering, satin gaps, or corner blowouts.
If the sample looks off, the file goes back to the workstation for a fix. The change might be smaller (reset the underlay density) or bigger (reroute the entire satin path). We restitch and check again. This loop continues until the sample reads clean. Only then does the file move to delivery.
The two machine test catches a quiet problem most studios miss. Machines differ. A file that runs perfectly on a Tajima head can break threads on a Melco head. Testing on two heads at once flags that risk before the file ever reaches your production floor.
Step 5: Format Conversion to Your Machine Code
The studio file is now ready. The last technical step is saving it in the machine format you actually run. We deliver all eight common embroidery formats: DST for Tajima, EMB for Wilcom, PES for Brother, JEF for Janome, EXP for Melco, VP3 for Husqvarna, XXX for Singer, and HUS for older Husqvarna setups.
If you run two different machine brands across two production lines, we send both formats at no extra charge. Vector deliverables are also included if your job needs them. We can export AI, EPS, PDF, SVG, and CDR alongside the stitch file. That’s useful when your team also does screen printing or signage from the same artwork.
Step 6: Delivery and Your Quality Promise
The finished file lands in your email inbox, or in your USA Digitizing Pro account portal if you have one set up. Most files ship the same business day if your order arrives before 3 pm Central Time. Anything that comes in after that window ships the next morning.
Every file is backed by an unconditional money back guarantee. If the stitched sample on your end does not match the digital preview we sent, we redo the file at no charge or refund the order. Plain and simple. No back and forth. No invoice tweaks.
This trust line is what new buyers usually flag in their first review of the brand. It matters because most digitizing studios will only refund if the file is broken. We refund if the stitch out doesn’t match the preview, which is a higher bar and the one that actually affects the apparel decorator.
Standard Turnaround at the Studio
The studio runs 2 to 4 hour standard turnaround for logos under 10,000 stitches. That covers most left chest, cap front and pocket placements. Larger jobs (jackets, full backs, intricate patches) run up to one business day. Same business day delivery applies if your order lands before 3 pm Central Time.
First time customers get free rush service on their first order, which means a job that would normally take 4 hours gets bumped to the front of the queue at no extra charge. Wholesale buyers ordering 25 or more designs per month get a dedicated account manager, NDA coverage on every file, and bulk ZIP packaging in the folder structure you specify. If a sample fails on your floor for any reason, we re stitch the file the same day. The redo clock resets to zero. You don’t pay twice.
How We Price a Logo Digitizing Order
Pricing at the studio is built around two simple rules. Any logo under 5 inches in any direction is a flat $10. Any logo above 5 inches starts at $25 and goes up based on stitch count and color complexity. The price you see at quote is the price you pay at delivery. No surprise line items.
Complex artwork (gradients, photo realistic faces, layered text under 5 mm) gets a custom quote before the work starts. You see the number before we touch the file. If you don’t like it, you walk away.
Wholesale tier pricing kicks in at 25 designs a month. That tier drops the per design rate, opens up an NDA, and adds a named account manager to handle daily volume. Promotional product distributors and contract embroidery shops sit in this tier.
A Real Order: Houston Apparel Decorator
Last quarter a small uniform shop in northwest Houston sent over a rugby team’s badge for digitizing. The artwork was a low resolution PNG, about 300 pixels wide, sourced from the team’s old jersey design. The deadline was tight. The shop needed 24 jerseys stitched the following Monday.
The intake digitizer flagged the file size first. PNG was workable but the badge had three letters under 4 mm tall that wouldn’t read at small size. We sent the shop a quick mockup with the smallest text bumped to 5.5 mm. The shop owner agreed in two minutes by reply email.
The file ran through manual digitizing in just under three hours. The two machine sample showed clean satin edges and zero registration drift on the cotton swatch. We saved it in DST for the shop’s Tajima rig and added PES as a backup format. Total cost to the shop was $25 because the badge was 5.5 inches across. The 24 jerseys stitched out without a single thread break on Saturday afternoon. The team played Sunday with their full kit.
Author Note: 11 Years on the Workstation
A short note from our lead digitizer. I have run embroidery digitizing workstations since 2014. Before USA Digitizing Pro I worked contract digitizing for cap manufacturers in the Greater Houston area. The single biggest thing I’ve learned in those 11 years is that the file is only half the job. The other half is what you communicate to the digitizer before any stitches go down. Send the smallest size you plan to embroider it at. Share the fabric type. Note the production deadline. With those three pieces of information, your digitizer can choose the right stitch density on the first try. Without them, every studio is just guessing.
Pre Send Checklist Before You Request a Quote
Run this list before sending your next logo for digitizing.
- 1 Save the highest resolution version of your artwork that you have. Vector is best. 300 dpi raster is acceptable.
- 2 Note the final embroidered size in inches. Left chest is usually 3 to 4 inches. Cap front is around 2.25 inches tall.
- 3 List the fabric you plan to stitch on. Cotton, polyester, canvas, knit, and fleece all need different density.
- 4 Share Pantone codes or specific thread codes if you have them. If not, mention which colors are flexible.
- 5 State your deadline in your local time. Studio runs on Central Time — orders before 3 PM CT ship same day.
- 6 Add the placement spot (Left chest, right sleeve, back yoke, cap front, bag panel, etc.).
- 7 Attach your machine format request. DST is the standard fallback if you’re not sure.
Frequently Asked Questions
Time varies with the design. A simple one-color text logo can wrap in under 60 minutes. A medium two to three color crest takes 2 to 3 hours. A photo-realistic 10-color portrait can run 8 hours or more on the workstation. Studios that promise 30 minutes for any logo are running auto-digitize, which is why those files tend to break threads. A typical business logo digitized by hand takes 2 to 4 hours.
Industry pricing sits between $10 and $80 per design at most US studios. The variance comes from stitch count, color count, and rush level. Some studios charge per 1,000 stitches. Others use simple flat tiers ($10 under 5 inches, $25 above 5 inches in our case). Watch for hidden fees. A few shops post a low base rate and tack on charges for edits, format conversion, or a sample test. Always ask if the quoted price covers all of those.
Yes, free options exist. Ink/Stitch (based on Inkscape) is open source and runs on Mac, Windows, and Linux. Embrilliance Express has a free starter tier. SophieSew is another free starting point. These work for personal projects or test runs. They aren’t built for production volume. Free tools cap stitch density, miss underlay logic, and don’t optimize per fabric type. For commercial orders, the time you spend learning the software is usually worth more than a $10 outsource fee.
No. A clean high resolution JPG, PNG, or PDF works for most logos. Vector helps when the artwork has fine lines or small text. A low resolution image still works. The digitizer manually traces the shapes during the audit step, which takes a bit longer but produces a clean file. Rasters below 100 pixels in any direction usually need a sharper version first.
Most studios run Wilcom or Hatch on a Windows workstation. Wilcom is the production standard for large shops and contract digitizers. Hatch is a more affordable tier built on the same code base. Some studios also run Tajima DG/ML by Pulse for advanced cap and applique work. Every package costs $1,000 to $10,000 with the higher tiers including better stitch path math and auto pull compensation that is closer to manual quality.
The preview is close but not identical. Stitch direction, thread sheen, and fabric texture all affect the final look. Satin areas tend to look slightly brighter on fabric than on screen because thread reflects light. Fill areas can look a touch darker because the thread sits flat. A reliable studio runs a stitch-out sample on real fabric before delivery, which catches the gap between preview and reality. Always ask for a sample photo if your job is high-value.
Send Your Logo to USA Digitizing Pro Today
If you’re ready to put a real logo digitizing process behind your next order, the team at USA Digitizing Pro is set up to take your job today. Standard turnaround stays inside the 2 to 4 hour window for designs under 10,000 stitches and the first rush job is on the house for new customers. Reach out through any of the channels listed below to send your artwork or request a written quote.
Follow Us


2 COMMENTS
[…] use JEF. Husqvarna uses VIP or VP3. For a full breakdown of which format goes with which machine, embroidery file formats explained covers the major types and their […]
[…] anyone unclear on how artwork becomes a stitch file, the logo digitizing process walks through every step from raw artwork to production-ready machine […]
Comments are closed.