Left Chest Logo Size Guide Embroidery: Getting the Dimensions Right 2026
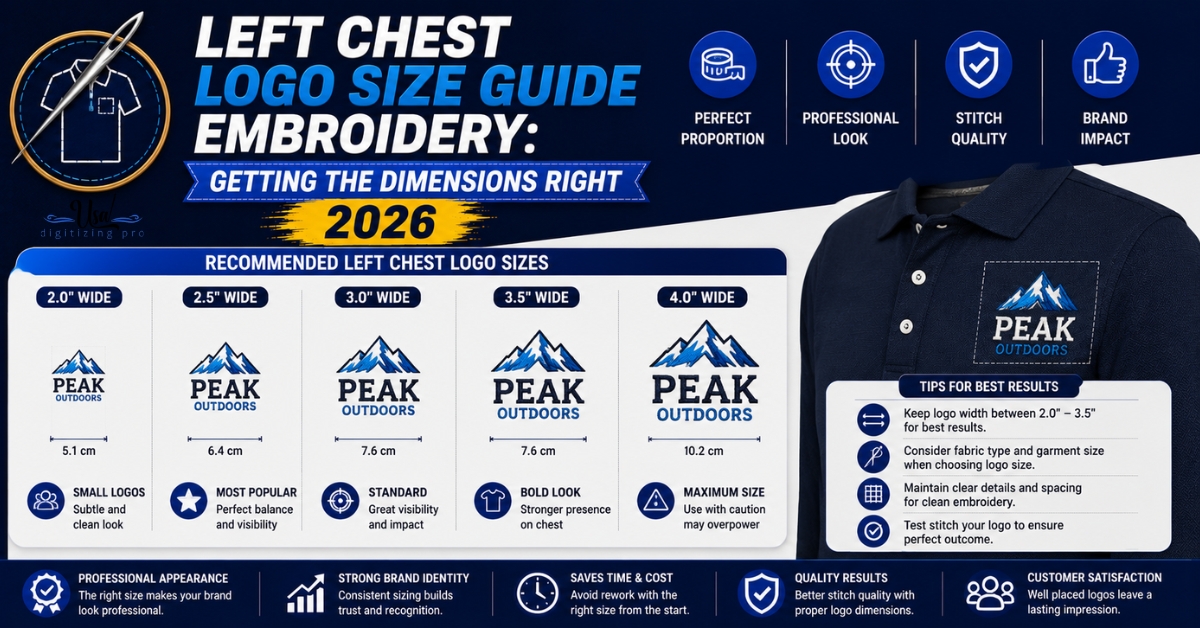
Order a left chest logo at the wrong size and you don’t just get a placement that looks off. You get a stitch file built around the wrong dimensions entirely, since column widths and text simplification decisions are locked in before digitizing starts. A left chest logo size guide for embroidery isn’t just about picking a number that looks right on a mockup. It’s about knowing the standard range, why it holds across most garments, and when your specific design needs to shrink further to actually sew clean. Here’s what decides the size before you ever submit artwork.
Quick Answer at a Glance
The Standard Left Chest Size Range
Left chest logos on adult garments run 3 to 4 inches wide in the large majority of orders, and rarely go past 4.5 inches even on a heavier jacket or fleece. That range isn’t arbitrary. It’s the zone that fits the open space above a shirt pocket without crowding the collar, the side seam, or the placket. For the placement math behind where that space actually sits on a garment, the full logo digitizing process walkthrough covers how placement size gets locked in during the design audit stage.
Height follows the shape of the logo itself rather than a fixed number, but most left chest designs land between 2 and 3 inches tall once the width is set. A wide horizontal wordmark will run shorter. A round crest or badge shape will run closer to square.
Size by Garment Type
Why the Size Has to Be Locked In Before Digitizing Starts
A stitch file built for 3.5 inches doesn’t scale cleanly to 5 inches, and the reverse is just as true. Column widths, stitch length, and satin density are all set relative to the finished size. Ordering a file at one size and asking for a bigger or smaller version later produces a file that’s been mathematically scaled rather than rebuilt, and a scaled file rarely sews as cleanly as one built for the actual target size from the start.
This is why confirming the finished size before submitting artwork matters more than most buyers expect. A quick way to check before committing: hold a business card up to the left chest area of the actual garment. That gives a realistic sense of scale that a screen mockup usually doesn’t.
When a Design Needs to Shrink Further Than the Standard Range
Here’s a detail most size guides skip. A logo that looks clean at 4 inches on screen can still need to shrink further, or get simplified, once it’s actually digitized at left chest scale. Fine internal detail, thin connecting strokes, and small text all compress at small sizes in a way flat artwork never shows you.
Text below about 5mm in cap height starts losing definition in satin stitching, with letters bridging together into a blur rather than reading as distinct characters. A digitizer will usually flag this during the design audit and suggest either bumping the smallest text up in size or simplifying the letterforms rather than shrinking the whole logo to fit a narrower space.
Why a Complex Logo Sometimes Needs to Run Larger, Not Smaller
It seems counterintuitive, but a logo with more going on inside it often needs more room, not less. A simple wordmark can run at the small end of the standard range and still read clearly. A crest with a mascot, a banner, and small supporting text crammed into the same 3.5 inches will lose most of its detail. When a complex design is heading to left chest placement, sizing toward the upper end of the standard range, closer to 4 or 4.5 inches, usually preserves more of the original artwork than forcing it smaller.
What Happens If the Wrong Size Gets Ordered
Ordering a size that’s too small for the design’s complexity produces a file where the digitizer has already had to simplify or drop detail before the first stitch runs, since the artwork simply can’t hold at that scale. Ordering a size that’s too large for the garment produces a logo that visually overwhelms a left chest position, crowding into the collar, seam, or armhole area on a smaller garment like a youth polo. Neither mistake breaks the embroidery machine. Both produce a result that looks off compared to what the buyer expected from the original artwork.
Pre-Order Sizing Checklist
- Confirm the exact garment type and size run (adult, youth, or both) before finalizing dimensions.
- Hold a business card to the actual garment’s left chest area to sanity-check the size in real life, not just on screen.
- Flag any text under 5mm cap height so the digitizer can simplify or resize it before digitizing starts.
- Decide the final width in inches, not pixels, and lock it in before submitting artwork for digitizing.
A Real Order, Broken Down
A regional real estate brokerage ordered a left chest logo for 60 polos ahead of a company event. Their submitted size was 4.5 inches, based on how the logo looked in a mockup on a large monitor. The design included a small tagline in a light script font beneath the main wordmark.
The digitizer flagged the tagline during the audit: at 4.5 inches overall, the script text was landing under 4mm in cap height, well below the point where satin stitching holds its shape. Two options went back to the client: bump the tagline’s relative size within the same logo, or drop it from the embroidered version and keep it for print use only. The brokerage chose to enlarge the tagline slightly and shift the main wordmark down proportionally. The revised file sewed cleanly across all 60 polos with the tagline fully legible.
Who Builds These Files
USA Digitizing Pro has digitized left chest logos from its Texas studio since 2015. Every file is built by hand, with size and text-legibility checks run during the design audit before any stitching starts. Standard turnaround runs 2 to 4 hours, with pricing starting at $15 for designs under 5 inches. Every file carries a money-back quality guarantee.
Frequently Asked Questions
Most adult garments use a left chest logo between 3 and 4 inches wide, rarely exceeding 4.5 inches. The exact number depends on the garment type and how much detail the logo carries, with simpler wordmarks sitting at the smaller end of that range.
The standard position centers the logo roughly 3 to 4 inches below the shoulder seam, aligned above where a shirt pocket would sit. On a polo, that typically lines up near the second button down from the collar.
Yes. Text below about 5mm in cap height tends to blur together in satin stitching regardless of overall logo size. If a design has small supporting text, the whole logo may need to run at the larger end of the standard range to keep that text legible.
Yes. Youth garments typically use a left chest logo around 3 to 3.5 inches wide, and toddler sizes often shrink further still. The proportions of the garment itself set the ceiling on how large a logo can sit without overwhelming the chest area.
Column widths, stitch length, and density are all set relative to the original finished size. Scaling the file mathematically changes the dimensions but not the underlying stitch decisions, so a resized file often sews less cleanly than one rebuilt from the artwork at the new target size.
Follow Us

RELATED BLOGS
How to Avoid Sink in 3D Puff Embroidery.
Published September 11, 2026 | By USA Digitizing Pro Team A puffed logo that stands proud at the outer letters and loses.