

3D Puff Embroidery Cost Per Design: What Drives the Price in 2026
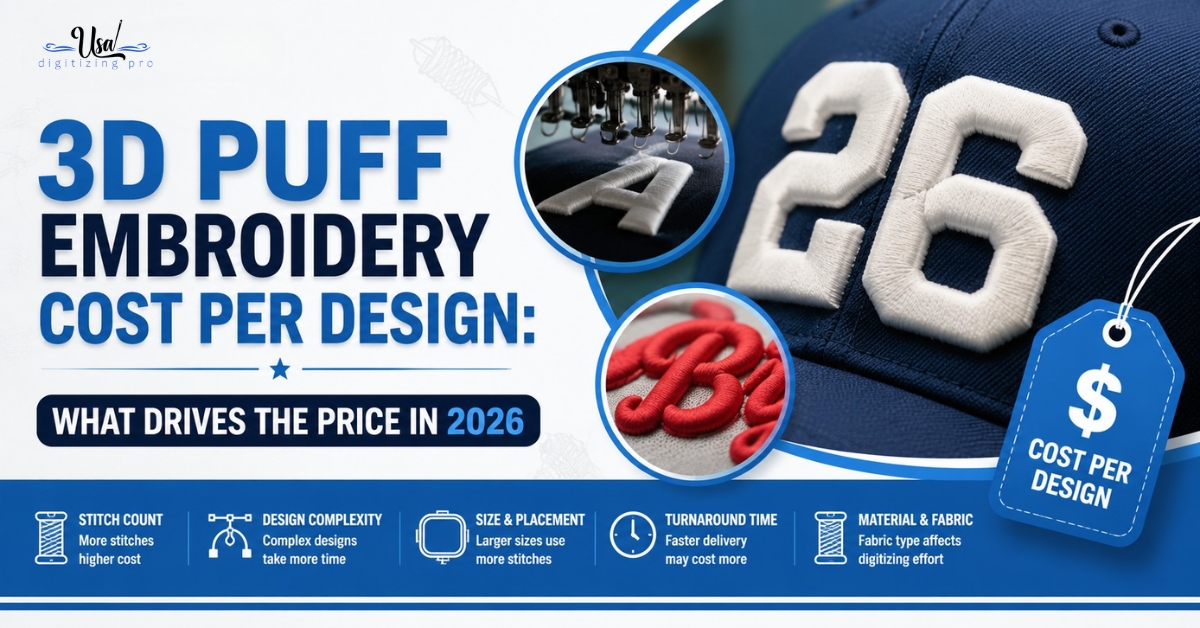
Ask five digitizers what 3D puff embroidery costs per design and you’ll get five different answers. That’s not a scam. Puff pricing isn’t a flat fee. It moves with foam height, stitch count, and how much of the cap the raised area covers. Maybe your last quote came back higher than expected. Maybe you’re ordering your first puff logo and have no idea what a fair number looks like. Either way, this guide breaks down exactly what pushes the price up or down, using the same factors a digitizer checks before quoting your file. By the end you’ll know what to check before you request a quote, not after.
Quick Answer
What “Cost Per Design” Actually Means
Cost per design: the one-time fee charged to build the digitized stitch file for your artwork, separate from whatever a decorator later charges to run that file on caps or shirts. The two numbers get confused constantly. A buyer asks a decorator “how much for puff embroidery” and gets a per-cap production quote, then compares it to a digitizing shop’s per-file price and assumes something is off. Nothing is off. They’re two different services.
The file itself only gets built once, and it can then be reused for 50 caps or 5,000 without the digitizing fee changing. Production costs, thread, labor, and machine time per cap, are billed separately by whoever runs the embroidery. Puff pricing is set by the file’s technical demands. Not by how many caps you plan to make.
The Core Factors That Drive 3D Puff Pricing
Four variables account for almost all of the swing in a puff quote. Here’s how each one works.
Foam Thickness and Height
Foam for cap puff work usually runs between 3mm and 6mm. Thin foam, around 3mm, is common on structured caps and keeps the design close to the surface. Thicker foam gives more visible height but needs wider satin columns to fully wrap the edge, and wider columns mean more thread and more build time. A logo built for 6mm foam almost always costs more to digitize than the same logo built for 3mm foam. Not because the artwork changed. Because the file did. For a closer look at what happens when foam height and cap curvature fight each other, see why raised letters sometimes sink on curved cap fronts.
Stitch Count and Column Width
Column width for puff satin work typically runs between 30pt and 110pt, well past what a flat embroidery file would ever need. Wider columns need more passes of thread to fully cover the foam and every extra pass adds build time. Stitch count alone is a weak predictor of price. A short, wide word can carry more stitches than a longer, narrow one. What actually matters is how much surface area needs foam coverage and how many open column ends need end caps. The same tradeoffs come up when digitizing dense, detailed artwork into a small hoop, where space and stitch density fight each other the same way foam and column width do here.
Design Size and Placement
A left chest logo at 3.5 to 4 inches sits at the smaller end of typical puff work. A full cap front wordmark covers more surface, needs more foam, and usually needs a wider range of column widths to fit the shape. Bigger placement areas cost more mainly because they need more material handling and stitch coverage. Not because the digitizing process itself gets harder to think through.
Complexity and Letterform Style
Bold sans serif lettering and simple geometric shapes are the easiest and cheapest puff builds. Thin serifs, small text under roughly 6mm cap height, and fine detail work all take longer, since the digitizer has to simplify elements or split the design between puff and flat stitching in the same file. That split, a puffed wordmark plus a flat detail element underneath, is a real technique and not a downgrade. It adds a build step, though, and build steps cost time. The core stitch settings that keep a puff design holding its shape cover this split file approach in more depth.
Why Two Similar Looking Logos Can Cost Differently
Here’s the thing. Two logos can look nearly identical on screen and price out differently once a digitizer opens the file. Hidden internal cutouts, thin connecting strokes between letters, and negative space that needs its own foam boundary all add build time that isn’t visible just by eyeballing the artwork.
Open column ends are another hidden cost driver. Every open end on a satin column needs an end cap, a small perpendicular fill that keeps foam from pushing out after washing. A logo with five open ends takes longer to finish correctly than a logo with two, even at the same overall size. You won’t catch this looking at a flat picture of the design. A digitizer sees it once the shape gets traced file by file. Common raised-stitch problems that show up after a cap ships trace back to exactly this kind of missed detail more often than people expect.
3D Puff vs Flat Embroidery: A Side-by-Side Cost Look
Both techniques stitch onto fabric, but the build effort behind each file is different enough to explain most of the price gap.
Turnaround Time and Rush Work
Standard turnaround for a puff file runs 2 to 4 hours once the design is approved for the technique. That timeline holds regardless of order size, and rush requests aren’t charged extra at USA Digitizing Pro. Not every shop works that way. Some providers apply a rush surcharge on top of the base fee, so it’s worth asking directly before you submit artwork on a deadline. A same-day cap order and a same-day jacket-back order get treated the same on turnaround, even though the jacket design usually covers more surface area.
What You’re Actually Paying For in a Puff File
The fee covers more than just stitching a shape onto foam. Here’s what’s actually included:
- A file built by hand, not run through auto-digitizing software
- End caps placed on every open satin column so foam stays locked in after washing
- Underlay set manually for foam, since standard flat-embroidery underlay pushes foam down
- Needle size and machine speed guidance matched to your chosen foam thickness
- Delivery in your specific machine format: DST, PES, JEF, VP3, and others
- Free edits if the first version doesn’t sew the way you expected
You can see the full scope of what’s included on the studio’s 3D puff digitizing service page, and the same build discipline applies across the full step-by-step logo file process used for non-puff logos too.
How to Get an Accurate Quote Without Guessing
- Send the cleanest version of your logo you have. A vector file (AI, EPS, or PDF) beats a low-res screenshot every time.
- State the finished size in inches, not pixels, since foam and column width decisions depend on real-world dimensions.
- Name the exact cap or garment style. A structured snapback and a soft unstructured cap curve differently, and that changes the build.
- Flag any thin lines, small text, or fine detail up front, so the digitizer can suggest a simplification before starting rather than after.
- Ask directly whether the quote includes a foam thickness recommendation or covers only the digitizing fee. Some shops separate the two.
A Real Order, Broken Down
A screen printing shop in Ohio needed a puff logo for a 50-cap run. Their first quote came back higher than they expected. The reason turned out to be a thin script tagline under the main wordmark, four words in a light, connected font that wouldn’t hold up in foam at that size.
The digitizer suggested keeping the main wordmark in bold puff lettering and switching the tagline to flat embroidery underneath it. The revised file cost less to build than an all-puff version would have, and it looked cleaner on the finished caps. (You’ve probably guessed by now that “more puff” doesn’t always mean a better result.) The shop reordered the same file twice more that year without the price changing, since the digitizing fee only applies once per design.
Who Builds These Files
USA Digitizing Pro is a Texas based digitizing studio that has been building embroidery files since 2015. Every puff file is handled by a human digitizer rather than an auto-digitizing script, and that holds true across caps, jackets, and left chest work alike. The team backs its output with a money back quality guarantee on any file that doesn’t sew correctly, a policy detailed alongside fixes for the most common cap stitching problems on the site’s blog.
FAQs | 3d puff embroidery cost per design
3D puff embroidery is a stitching technique where foam sits under satin thread, lifting the finished design above the fabric surface. Once the machine finishes stitching, the excess foam gets trimmed away, leaving raised lettering or shapes behind. It shows up most on structured caps and hats, though jacket backs and bags use it too. The raised look is what separates it visually from flat embroidery, which sits level with the fabric.
Regular embroidery stitches run flat against the fabric with nothing underneath. Puff embroidery adds a foam layer that the stitches wrap around, creating height and shadow that flat stitching can’t produce. The digitizing file is built differently too, with wider satin columns, manual underlay, and end caps that flat files skip entirely. Visually, puff reads as bolder and more dimensional from a distance.
Yes, with a few precautions. Cool or warm water washing is fine and won’t damage the foam. High heat is the real risk: a hot dryer permanently compresses the foam, and ironing directly over a puff design flattens both the foam and the thread. Air drying or a low-heat cycle keeps the raised effect intact far longer than a hot dryer would.
A correctly built puff file with proper end caps and full foam coverage holds its shape through normal wear and regular cool-water washing. The edges of the design are the most vulnerable point, so a file with gaps in coverage shows wear there first. Longevity comes down more to the quality of the digitizing file than to the embroidery machine used to stitch it.
Most digitizers set a rough floor of 6mm in letterform height for puff text. Below that, satin columns can’t get wide enough to fully cover the foam, and letters start losing their shape or bridging together. Smaller text is usually handled better as flat embroidery within the same design instead of being forced into puff.
Yes, and it’s a common approach for logos with a bold main element and finer supporting details. The machine stitches the flat sections first, pauses for foam placement, then continues with the puff sections. This split keeps small text or fine icons legible while still giving the main shape a raised, dimensional look.
Standard formats include DST, PES, JEF, VIP, VP3, HUS, and EMB, covering most commercial and home embroidery machine brands. If your machine uses a less common format, mentioning the brand at order time is usually enough for the digitizer to match it. One file typically converts cleanly across formats once the stitch data is built.
Structured caps are the most common use, but puff also works on jacket backs, bags, and some heavier woven fabrics. Soft, stretchy materials like light t-shirt jersey generally aren’t a good match, since they don’t hold the foam’s shape as well as a firmer cap panel or jacket back does.
This almost always traces back to the digitizing file rather than the embroidery machine. Either the satin column wasn’t wide enough to fully wrap the foam, or an open column end was left without an end cap. Foam color mismatched to the thread can also make small coverage gaps look more visible than they actually are.
For logos with bold lettering or simple shapes, puff often earns its cost back in shelf appeal. Raised embroidery photographs better, reads clearly from a distance, and stands out next to flat-stitched competitors on a rack. For small, detailed logos, the extra cost may not be worth it, and a well-digitized flat file will usually look cleaner than a forced puff version.
Get a Number, Not a Guess
3D puff embroidery cost per design comes down to a handful of concrete factors: foam height, column width, design size, and how forgiving your letterforms are. None of that requires guesswork on your end. Send your logo, note the size and cap style, and flag anything with fine detail, and a proper quote should reflect the actual build rather than a rough estimate. USA Digitizing Pro provides free quotes on puff files and backs every order with a money-back quality guarantee.

RELATED BLOGS
Hat Machine Embroidery: What the Machine Decides About.
Published October 2, 2026 | By USA Digitizing Pro Team Hat machine embroidery looks like a software problem and it is mostly.

Types of Color Separations for Screen Printing: Complete.
Published August 17, 2026 | By USA Digitizing Pro Team Six distinct separation methods cover essentially every screen printing job and most.
1 COMMENT
[…] Sequence flat elements before the foam stop, then test. For the pricing side of puff work, the puff cost breakdown covers what drives the […]