

How to Avoid Sink in 3D Puff Embroidery on Curved Caps 2026
Published September 11, 2026 | By USA Digitizing Pro Team
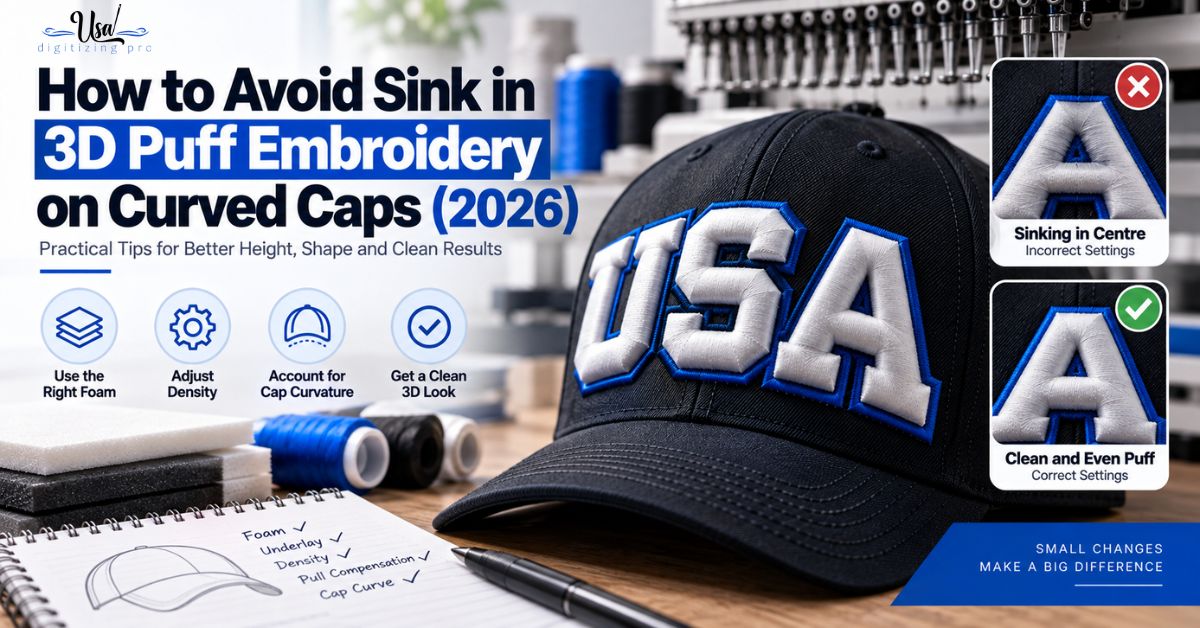
A puffed logo that stands proud at the outer letters and loses height toward the middle of the cap is not a foam quality problem, and buying thicker foam will not fix it. Sink is what happens when a design built for a flat plane meets a panel curving away in two directions while under frame tension. The countermeasures split cleanly into things the operator controls at the frame and things that have to be built into the file.
Quick Answer at a Glance
| Cause of Sink | Countermeasure | Where It Lives |
|---|---|---|
| Cap moving in the frame | Mount tight enough that the panel behaves like tensioned skin | Frame |
| Stitches pulling into mesh | Non-woven topper over the stitching area | Frame |
| Foam shifting on the curve | Tape or adhesive holding foam during placement | Frame |
| Fabric drawing in under the needle | Raised pull compensation, commonly 0.5 to 1mm on puff | File |
| Capping not compressing foam enough | Density raised well above flat settings | File |
| Stitch angle following the curve | Angles crossing the curve to balance distortion | File |
| Traditional underlay flattening foam | Centre line plus tackdown anchoring instead | File |
What Sink Actually Is
Sink gets used loosely for any loss of puff height, which hides the fact that three different faults produce a similar look and need different fixes. Separating them saves chasing the wrong solution.
Sink, Collapse, and Flattening Are Different Faults
Collapse is a column too narrow to hold foam, so the capping stitches crush it. Flattening is usually a zigzag underlay pressing the foam down before the top stitches arrive. Sink is different from both: the foam is the right thickness, the column is wide enough, and the height still falls away toward the curved centre of the panel while the edges stand up fine. That uneven pattern across the design is the tell. the puff cap issue diagnosis guide covers the other two faults in detail.
Why the Curve Causes It
A cap front curves away from the needle in two directions at once, and the frame holds it under tension while the machine works. Stitches landing near the centre of that curve meet fabric that is both angled away and stretched, so they pull the foam down rather than capping across it cleanly. The outer parts of the design sit closer to flat and closer to the frame’s support, which is why they keep their height while the middle does not.
The Frame and Material Side
Three of the countermeasures are physical and happen before the machine starts. They cost nothing beyond a minute of setup and they solve a meaningful share of sink cases on their own.
Tensioning the Cap Properly
Mount the cap so the front panel behaves like a tensioned skin rather than a loose surface sitting in a frame. If the cap can wiggle at all, registration drifts during the run and the foam gets worked rather than capped. Re-mounting a marginal cap takes seconds and is worth doing before starting a puff run rather than after inspecting the first piece. the structured versus unstructured cap guide covers how the two constructions behave differently under tension.
Toppers on Mesh Panels
On mesh or open-weave cap panels, stitches sink into the holes instead of sitting on the surface, which reads as lost height even where the foam is intact. A non-woven topper laid over the stitching area gives the stitches something solid to land on. Secure it to the frame with double-sided tape placed along the edges of the stitching area rather than inside the design zone, so no adhesive ends up under the needle path.
Holding Foam Still on a Curve
Foam that sits flat on a jacket back wants to slide on a curved cap panel. After the machine runs the placement outline and stops, a small piece of masking tape or a light adhesive spray holds the foam cutout in position while stitching starts. Foam shifting even slightly during the first stitches produces uneven capping, which then reads as sink in whichever area lost its coverage.
The File Side: Compensation and Density
The remaining causes are built into the file and cannot be corrected at the machine. Both settings below run higher on puff than they would on the same design flat.
Pull Compensation for Puff
Pull compensation widens elements slightly to offset the fabric drawing inward as stitches land. Puff needs more of it than flat work, since the needle is also passing through foam that shifts as it is penetrated. US sources commonly cite figures around 0.5mm to 1mm for puff, or an increase of roughly 10 to 15 percent over the equivalent flat setting. On a curved panel the upper end of that range is usually the safer starting point. the puff foam and width settings guide covers the column width side of the same problem.
How Much to Raise Density
Capping density has to compress the foam and fully enclose its edge, which takes considerably more coverage than laying satin on flat fabric. Guidance across US sources points to a substantial increase over standard settings, with figures around a fifty percent lift commonly quoted for foam work. Published absolute values differ because sources use different measurement conventions, so the reliable instruction is the relationship: raise density well above your flat baseline, then confirm on a test that no foam shows and the height holds across the whole design rather than only at the edges.
Base Density Versus Capping Density
Puff work distinguishes between the foundation stitching that anchors and positions the foam, which runs lighter, and the capping satin that compresses and encloses it, which runs much denser. Treating both at one setting is a common error. Too light on the capping and the foam pushes back and shows through. Too heavy on the foundation and the foam gets pressed down before capping even begins, which is flattening rather than sink but looks similar in the finished cap.
Stitch Angle Across the Curve
Angle is the most overlooked sink countermeasure and costs nothing in stitch count. It decides whether the curve fights the design evenly or concentrates its pull in one area.
Crossing the Curve Rather Than Following It
Setting stitch angles so satins and fills cross the panel’s curvature spreads the distortion across the whole element rather than letting it accumulate in one place. Angles that run along the curve let the pull build in the same direction the fabric is already moving, which is exactly where height disappears first. This is a digitizing decision made per element, not a global toggle.
Why Sudden Angle Changes Cause Uneven Height
Where stitch angle changes abruptly between adjacent parts of a design, the foam gets compressed from two different directions within a short distance, producing visible height variation and inconsistent edges. Transitioning angles gradually keeps the compression even. This matters more on caps than flat garments because the panel curvature is already introducing variation the design does not need added to. the corner capping methods guide covers the related angle handling at turns.
Centre-Out Sequencing
Structured caps generally want the design stitching outward from the centre rather than running across from one side. Centre-out sequencing keeps the tension the design creates balanced around the middle of the panel, which is the area most prone to sink. Running left to right pushes accumulated distortion ahead of the needle and dumps it on the far side of the design.
Replacing Underlay With Anchoring
Underlay is standard practice everywhere else in embroidery and actively harmful in puff areas. What replaces it is a different job with a different name.
Why Traditional Underlay Makes Sink Worse
Conventional underlay exists to press fabric flat and stable before the visible stitches run. Under foam, it does exactly that to the foam, compressing the height you are trying to create before the capping satin has done anything. On a curved panel, the effect concentrates where the curve is deepest, which is precisely where sink appears. the underlay settings explainer covers where underlay does belong on cap work.
Centre Line and Tackdown Instead
What puff areas need is anchoring rather than support: a centre positioning line that locates the foam, followed by tackdown stitches holding it in place, and then the capping satin. None of those press across the foam’s width the way a zigzag underlay does. The foam itself provides the body that underlay would normally supply, which is why adding underlay on top of it is redundant as well as harmful.
Preventing It on the Next Run
Sink is predictable enough that a short pre-run routine catches almost all of it, and the test cap confirms the rest.
Pre-Production Checklist
- Re-mount the cap until the front panel is genuinely taut with no movement.
- Add a non-woven topper on mesh or open-weave panels, taped outside the design zone.
- Secure the foam with tape or light adhesive at the placement stop, especially on deep curves.
- Confirm the file has no traditional underlay in puff areas, only a centre line and tackdown.
- Check pull compensation is raised above the flat equivalent and density is well above baseline.
- Stitch a test cap and check height at the centre of the panel, not only at the edges.
A Real Order, Broken Down
A Texas cap decorator ran a puffed arch wordmark on structured six panel caps. The outer letters stood tall and the middle three sat visibly lower, the classic sink pattern. Three things were contributing at once. The file carried a light zigzag underlay through the puff areas, left over from the flat version of the logo. Pull compensation was at the flat work setting rather than raised for foam. And the stitch angles ran along the arch, following the panel curve instead of crossing it. Removing the underlay, raising compensation toward the upper end of the puff range, and re-angling the satins to cross the curvature recovered even height across all the letters. The frame side was already fine, which is why no amount of re-tensioning had helped before the file was rebuilt. the caps versus jackets puff comparison covers what changes when the same design moves to a flat surface.
Who Builds These Files
USA Digitizing Pro builds cap puff files from its Texas studio with compensation, density, and stitch angles set for curved panels rather than adapted from flat versions. Pricing starts at $15 for designs under 5 inches, with a 2 to 4 hour turnaround and a money-back quality guarantee. Service details are on the 3D puff digitizing page and the cap digitizing page.
Frequently Asked Questions
No. Collapse means the column was too narrow to hold foam at all. Flattening usually means a zigzag underlay pressed the foam down. Sink shows as height falling away toward the curved centre while the edges stand up correctly.
More than flat work. US sources commonly cite around 0.5mm to 1mm for puff, or an increase of roughly 10 to 15 percent over the equivalent flat setting, with the upper end safer on curved cap panels.
Substantially above your flat baseline, with a roughly fifty percent lift commonly cited for foam work. Published absolute figures vary by measurement convention, so raise it relative to your own standard setting and confirm on a test that no foam shows.
Not traditional underlay. It presses the foam down before capping. Use a centre positioning line and tackdown stitches to anchor the foam instead, then let the capping satin do the rest.
The needle pulls thread into the mesh openings rather than leaving it on the surface. A non-woven topper over the stitching area gives the stitches a solid surface to sit on, taped to the frame outside the design zone.
Hold it with a small piece of masking tape or a light adhesive spray after the placement outline runs and the machine stops. Foam that slides during the first stitches produces uneven capping.
Sequencing the design to stitch outward from the middle of the panel rather than across from one side, which keeps tension balanced around the area most prone to sink.
Pricing starts at $15 for designs under 5 inches, with larger or more complex designs quoted individually and a standard 2 to 4 hour turnaround.
Height Is Held, Not Hoped For
Avoiding sink in 3D puff on curved caps means accepting that the curve is working against you and building against it deliberately. Mount the cap taut, top mesh panels, hold the foam still. Then in the file, raise pull compensation above flat settings, raise capping density well above baseline, cross the curve with your stitch angles, and replace underlay with a centre line and tackdown. Do all of that and the height holds across the whole panel rather than only at the edges.
Follow Us

RELATED BLOGS

Vector Artwork for Screen Printing vs Embroidery: One.
Published July 11, 2026 | By USA Digitizing Pro Team Ask a screen printer and an embroidery shop what they need from.

Left vs Right Sleeve Embroidery: Industry Placement Rules.
Published August 17, 2026 | By USA Digitizing Pro Team Ask three uniform buyers which sleeve the logo goes on and you'll.