

Vector Artwork for Stitching: The Preparation Rules 2026
Published September 21, 2026 | By USA Digitizing Pro Team
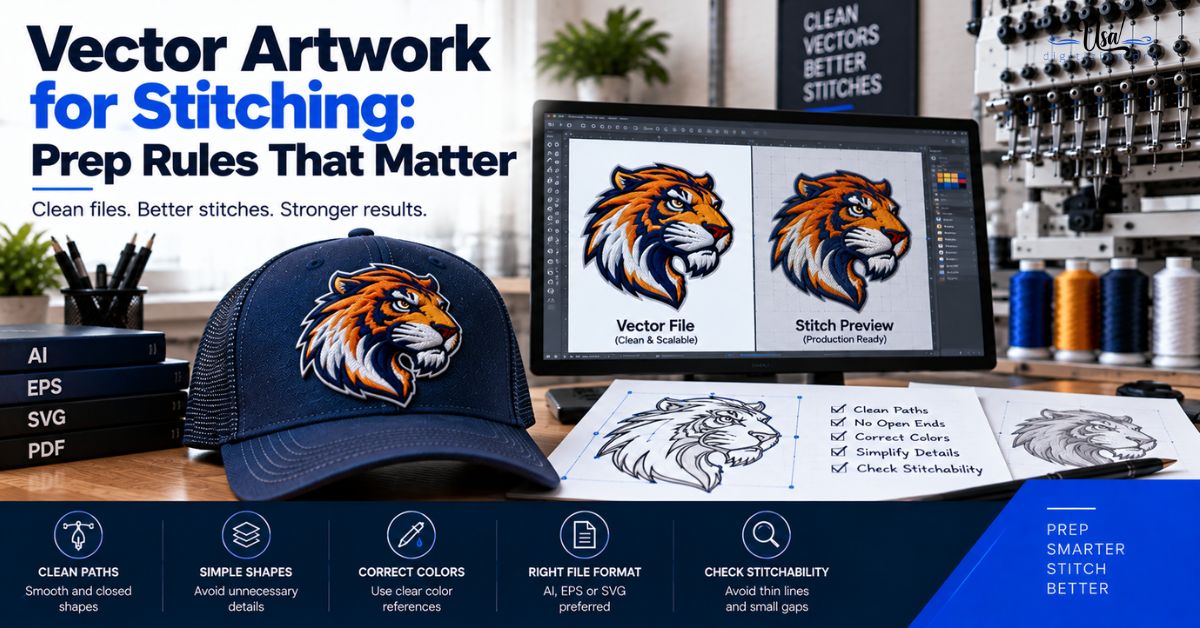
A vector file that prints perfectly can still be the wrong shape for embroidery. Vector artwork for stitching gets read differently from vector artwork for print, because a digitizer has to assign a stitch type to every element, and elements that a printer renders without complaint can be genuinely ambiguous to someone deciding whether something should be satin or fill. Five construction rules remove that ambiguity, and all of them take minutes in the file.
Quick Answer at a Glance
| Rule | What to Do | Why It Matters for Stitching |
|---|---|---|
| Close every path | No open paths anywhere in the file | Open paths confuse digitizing software |
| Expand strokes | Convert outlines into closed shapes | A stitch type cannot be assigned to a stroke |
| Outline text | Convert live type to vector shapes | Removes font dependency and ambiguity |
| Merge overlaps | Union shapes that sit on top of each other | Stops hidden layers being stitched |
| Clean the nodes | Remove excess anchor points | Jittery paths produce jagged stitch paths |
| Set finished size | Build the file at the real placement size | Detail limits depend entirely on size |
Why Vector Artwork for Stitching Has Extra Rules
The same file serves both purposes, and the two processes ask completely different things of it. Understanding the difference explains every rule that follows.
Print Only Needs It to Render
A printer or a screen takes the file and renders whatever it describes. An open path with a stroke applied renders exactly as intended, because the software draws a line of that thickness along that path. Nothing about the underlying structure needs resolving, since rendering is the whole job.
Stitching Needs It to Be Interpreted
Digitizing is different. Every element has to be identified as a region that gets a particular stitch type, at a particular density, running in a particular direction. A stroke is not a region, it is a line with a visual thickness, so it has to become a closed shape before any of that can be decided. That single distinction drives most of the preparation work. how stitch type gets assigned by width covers what that decision depends on.
The Five Construction Rules
These are the rules US digitizing sources and vector workflow documentation agree on. None of them are difficult, and skipping any one of them creates work for the digitizer or ambiguity in the result.
Rule One: Close Every Path
Every shape in the file should be fully closed. Open paths, meaning shapes where the start and end points never join, confuse digitizing software because the boundary of the region is undefined. Most vector applications have a close path command, and running through the file to find and close stragglers is quick. This is the most common structural fault in files that otherwise look fine.
Rule Two: Expand Every Stroke
A stroke is a visual property applied along a path, not a shape with its own boundary. Before a digitizer can assign satin, fill, or a running stitch to it, that stroke has to be expanded into a closed shape with its own outer edge. The command is usually called stroke to path or outline stroke. Note that expanding a stroke locks its width, so set the intended thickness before expanding, keeping satin columns above the practical minimum. the minimum width thresholds covers where those floors sit.
Rule Three: Convert Text to Outlines
Live text depends on the font being installed wherever the file is opened. If it is not, the application substitutes something else and the logo arrives wrong without anybody being told. Converting text to outlines turns each letter into a vector shape, which removes the dependency entirely. Keep an editable copy with live text for your own future use, and send the outlined version.
Rule Four: Merge Overlapping Shapes
Where two shapes overlap, the hidden portion of the lower one still exists in the file. Left in place, it can end up stitched, which wastes thread and machine time and adds bulk under the visible layer. Using a union operation merges overlapping paths into a single continuous outer path, so only what is visible is present in the file.
Rule Five: Clean Up Excess Nodes
Files that came from auto-tracing often carry hundreds of chaotic nodes following image noise, and those jittery paths produce jagged stitch paths when followed. Removing unnecessary points and smoothing curves gives cleaner, more predictable stitch flow. how to spot an auto-traced file covers identifying the problem before it reaches this stage.
Sizing Rules That Apply Before Digitizing
Two sizing decisions belong in the vector file rather than being left to the digitizing stage, because both change what is possible.
Set the File at Finished Size
Build or scale the artwork to the actual dimensions it will be stitched at. A logo at eight inches and the same logo at three inches are effectively different design problems, since detail that resolves at one disappears at the other. Supplying the file at finished size means every judgment about what survives gets made against reality rather than an assumption.
Check Minimum Feature Widths
Once the file is at finished size, look at the narrowest elements. Thin lines and small lettering have physical floors below which they cannot hold as stitches, and finding those elements in the vector is far cheaper than finding them on a sample. Thickening a hairline or enlarging a tagline at this stage takes seconds.
Color Rules Worth Applying Early
Color decisions made in the vector file carry straight through to production cost, which makes them worth settling before the file leaves your hands.
Keep the Palette Tight
US guidance for embroidery-bound artwork commonly suggests keeping designs to roughly eight to twelve colors to stay manageable and affordable. Every color is a thread change on every garment in the run, so consolidating two near-identical shades in the vector saves on every piece produced. Most shops also include a limited number of colors before per-color charges begin.
Flatten Gradients Deliberately
Gradients cannot be reproduced in thread, so they will be converted into solid blocks whether or not you decide how. Doing it yourself in the vector means you choose where the boundaries fall and which shades survive. Leaving it means somebody else guesses at your intent. what changes when artwork becomes stitches covers the full set of translation losses.
What Happens If You Skip These
The consequences are specific rather than vague, and two of them cost real money on a production run.
Hidden Layers Get Stitched
Unmerged overlapping shapes can result in the machine stitching areas nobody will ever see, underneath the visible layer. That is added stitch count, added runtime on every garment, and added bulk that can distort the fabric. It is entirely avoidable with one union operation in the vector file.
Strokes Become Guesswork
An unexpanded stroke leaves the digitizer deciding how thick you meant it to be and whether it should be a satin column or a running stitch. They will make a reasonable choice, and it may not be yours. Expanding the stroke at the intended width communicates the decision precisely, with no revision cycle needed to correct an assumption. the settings behind common digitizing faults covers what happens when narrow elements get the wrong stitch type.
Preparing a File to Send
Running this sequence before sending artwork removes almost every avoidable revision, and it takes minutes.
Preparation Checklist
- Scale the artwork to the finished stitched size.
- Close every open path in the file.
- Set stroke widths as intended, then expand all strokes to closed shapes.
- Convert all text to outlines, keeping an editable copy for yourself.
- Union overlapping shapes so no hidden geometry remains.
- Reduce excess nodes, tighten the color palette, and flatten any gradients.
A Real Order, Broken Down
A Texas apparel startup sent an AI file that looked clean on screen. Inside it, the badge outline was a live stroke rather than an expanded shape, the tagline was live text in a font the studio did not have, and the emblem sat on top of a background circle that had never been trimmed. Opened elsewhere, the tagline substituted into a different typeface entirely. The outline had no defined width to work from. The hidden circle would have added several thousand stitches under a layer nobody would see. All three were fixed in the vector file in under ten minutes, and the digitizing then ran without a single revision. what to send your digitizer covers the rest of the brief that goes with the file.
Who Builds These Files
USA Digitizing Pro prepares stitch-ready vector artwork and digitizes from it, in its Texas studio since 2015. Pricing starts at $15 for designs under 5 inches, with larger or more complex work quoted individually and a money-back quality guarantee. Vector preparation is covered on the vector artwork page, and stitch file building on the logo embroidery digitizing page.
Frequently Asked Questions
Scale it to finished size, close every path, expand all strokes into closed shapes, convert text to outlines, merge overlapping shapes, and clean up excess nodes. Tighten the color palette and flatten gradients while you are in there.
A stroke is a visual property applied along a path rather than a shape with its own boundary. A digitizer assigns stitch types to regions, so the stroke has to become a closed shape before satin, fill, or a running stitch can be assigned to it.
Open paths confuse digitizing software because the boundary of the region is undefined. Closing every path is quick and prevents ambiguity in how the shape gets interpreted.
Yes. Live text depends on the font being installed wherever the file is opened, and a missing font gets substituted silently. Outlining turns letters into vector shapes and removes the dependency. Keep an editable copy for yourself.
The hidden portion of a lower shape still exists in the file and can end up stitched under the visible layer, adding stitch count, runtime, and bulk. A union operation leaves only what is actually visible.
US guidance commonly suggests keeping designs to roughly eight to twelve colors to stay manageable and affordable, since every color is a thread change on every garment in the run.
Yes, ideally. Detail that resolves at eight inches can disappear at three, so building at finished size means decisions about what survives get made against reality.
Prepared Files Come Back Better
Vector artwork for stitching is the same artwork with the ambiguity removed. Close the paths so regions are defined. Expand the strokes so widths are decided. Outline the text so fonts cannot substitute. Merge the overlaps so nothing invisible gets stitched. Ten minutes of that in the vector file prevents the revision cycles that come from somebody else making those calls on your behalf.
Follow Us

RELATED BLOGS
Exploring the Power of Vector Artwork: One File,.
Published September 11, 2026 | By USA Digitizing Pro Team Most business owners meet vector artwork the same way: a vendor rejects.

How to Stop Embroidery From Bunching: 7 Causes.
Published August 17, 2026 | By USA Digitizing Pro Team Fabric gathering up around a finished design is the most common complaint.