

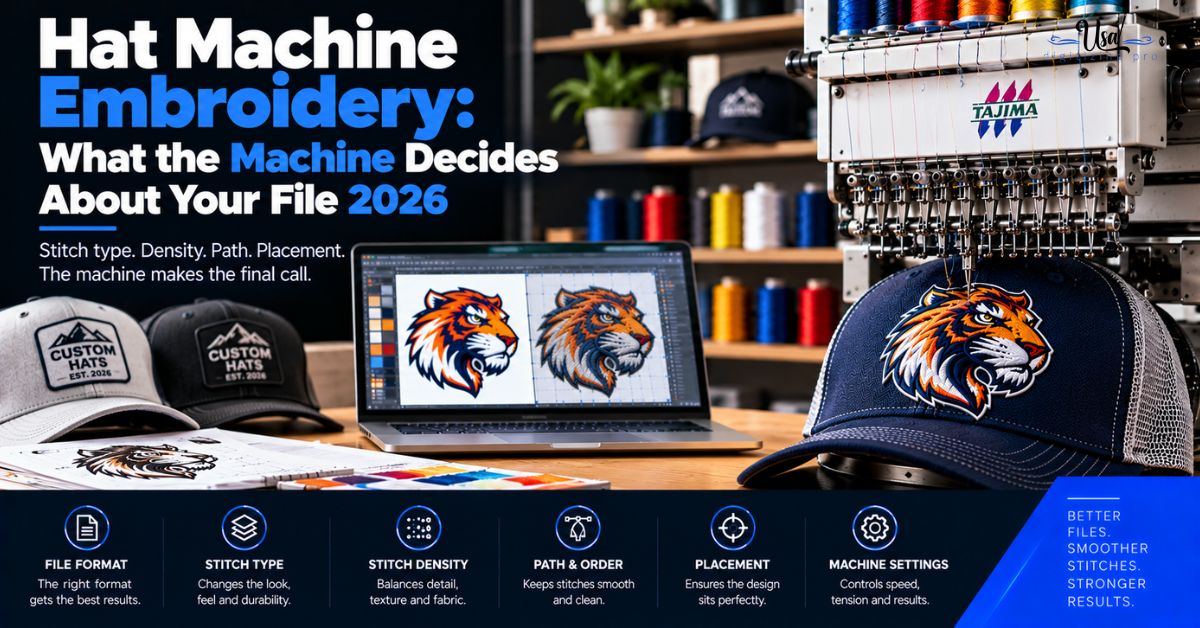
Hat Machine Embroidery: What the Machine Decides About Your File 2026
Published October 2, 2026 | By USA Digitizing Pro Team
Hat machine embroidery looks like a software problem and it is mostly a hardware problem. Before anyone opens a digitizing program, the equipment has already made four decisions: how big the design can be, how many colors it can hold, where on the cap it can reach, and whether the bill can be touched at all. Most guides about this topic list machine features. Almost none of them explain what those features take away from you. That gap costs shops money, because a file built without knowing the machine is a file that gets rebuilt.
This article works in the other direction. It starts with the machine, names the real published limits, and then shows what each limit forces the stitch file to do.
Quick Answer at a Glance
Here are the numbers that decide most hat jobs. Everything after this section explains where they come from and what to do about them.
| Question | Short answer |
|---|---|
| Can a home machine do hats? | Soft and unstructured hats, yes, with a flat hoop and sticky stabilizer. Structured caps and bills, no. |
| What makes a machine a hat machine? | A cap driver plus a cap frame, so the cap rotates under the needle instead of the needle traveling flat. |
| Typical cap frame field | Roughly 2 3/8 x 5 1/8 inches, or 60 x 130 mm, on a standard cap frame |
| Wide angle reach | Around a 13 inch turning area with about a 12.5 inch sewing area on most 270 degree frames |
| Realistic cap speed | Near 850 stitches per minute, well below advertised flat speeds |
| Color ceiling | Your needle count. A 15-needle head means 15 colors without rethreading. |
| Can the bill be embroidered? | Only on a commercial machine with a bill-capable setup. A domestic motor will not punch a constructed bill. |
Why Hats Need Their Own Machine Setup
Flat embroidery moves a hoop around under a fixed needle. The fabric stays in one plane the entire time. A cap breaks that model in three ways at once, and each one needs a hardware answer rather than a software one.
The Curve Is the Whole Problem
A cap front is not flat and it is not a simple cylinder either. It curves horizontally across the panels and it rises vertically from the bill seam toward the crown. A hoop can only hold one of those curves still. Suppliers describe this plainly: hats have curved surfaces and structured fabrics, and the curvature makes them hard to hoop and align in the first place.
That curve creates a second issue called flagging. The unsupported fabric lifts as the needle rises, which pulls the stitch out of position before it sets. Flagging is the root cause behind most crooked cap logos, and no amount of design editing fixes it if the frame is not holding the panel down.
What a Cap Driver Actually Does
A cap driver, sometimes called a cap rotator, is the part that changes the geometry. Instead of sliding the cap around flat, the driver rotates the cap itself under the needle so the stitching surface stays perpendicular to the needle at the moment of penetration. The needle hits a flat spot that moves around the cap rather than hitting a curve.
That rotation is why a cap frame and a flat hoop are not interchangeable. The frame clamps the cap body against a curved backing plate and the driver turns the whole assembly. It also explains why sequencing matters so much on caps. Because the cap rotates, stitching order affects how much the fabric shifts, which is why cap files get built center-out and bottom-up rather than in whatever order the artwork happens to list.
Where a Flat Hoop Still Works
Not every hat needs a driver. Soft and unstructured hats will usually sit in a standard flat hoop, and many decorators hold them with a tear-away sticky stabilizer instead of clamping the fabric. Specialty hoop clips can also grip the bill and hold it clear of the sewing area. Hat patches are even simpler, because a patch is flat material until it goes onto the cap.
The honest limit is what the machine can punch. Reports from decorators who do this routinely are consistent: with a flat hoop and some patience you can reach the front, the back, and even the sides of a soft cap. The bill of a constructed cap is a different matter, because a domestic motor does not have the force to drive a needle through a rigid bill repeatedly. If your product list includes structured six-panel caps, the flat hoop route runs out quickly.
Machine Types and What Each One Can Run
The split that matters is needle count, not brand. Needle count changes what the machine can do without an operator standing next to it, and that single factor reshapes how a file should be built.
Single-Needle Machines
A single-needle machine has one needle and one thread path. Every color change means stopping, rethreading, and restarting. On a flat garment that is an inconvenience. On a cap it is a risk, because each stop is a chance for the panel to shift inside the hoop. Industry guidance points at exactly this: manual color changes are slow and they raise the chance of misalignment when the cap has to be handled again.
Single-needle hoops also usually attach at one point. Heavier material puts more stress on that single attachment, and cap fabric with buckram behind it is heavy material. Commercial frames use two attachment points for that reason.
Multi-Needle Commercial Machines
A multi-needle machine carries a separate threaded needle for each color. When the file reaches a color change the head indexes to the next needle and keeps going. Nothing gets touched and nothing moves. On a ten or fifteen needle machine every color in a normal logo loads before the run starts.
That is the real production difference. A five-color cap logo on a single-needle machine means four stops and four chances to lose registration. The same file on a fifteen-needle head runs continuously. Multi-needle machines also carry the motor and the frame rigidity to handle structured panels, which is why commercial cap work lives here.
Side by Side
| Factor | Single-needle | Multi-needle commercial |
|---|---|---|
| Color changes | Manual, machine stops | Automatic needle index |
| Hoop attachment | Usually single point | Two point rigid frame |
| Structured caps | Difficult to impossible | Standard work |
| Constructed bills | Not practical | Possible with correct setup |
| Registration risk | Rises with every color | Low, no rehooping |
| Best fit | Soft hats, patches, low volume | Production cap runs |
The Four Hard Limits You Design Around
This is the part other articles skip. Four machine specifications act as fixed walls. You cannot design past them and you should not try. Knowing the numbers before artwork gets approved saves an entire revision cycle.
Field Size Decides Your Dimensions
A cap frame has a published embroidery field. Baby Lock lists its cap frame field at 2 3/8 by 5 1/8 inches, which is 60 by 130 mm. That is the sewable rectangle, not the cap front. The usable design area is smaller still once you allow clearance from the bill seam and the crown seam.
Practically that means a cap logo is a wide, short shape. Tall layouts do not fit, and a logo built for a left chest will not simply scale onto a cap front. Something has to be reorganized, usually by stacking less and spreading wider. That reorganization is a digitizing decision, and it changes which stitch types a digitizer can use on the letters that survive the resize.
Needle Count Decides Your Color Count
Your needle count is your color ceiling. A fifteen-needle head runs fifteen colors. Ask for sixteen and someone has to stop the machine and rethread, which on a cap means added registration risk at the worst possible moment.
This is why color reduction is part of cap digitizing rather than an afterthought. Gradients, drop shadows, and near-identical tints get merged before the file is built. A thread chart does not hold subtle color steps anyway, and the panel does not have the real estate to show them. Reducing to a clean palette up front also makes the machine file formats behave predictably when the file moves between a digitizer and a production floor.
Frame Reach Decides Your Placement
Standard cap frames handle the front panels. Wide angle frames extend the reach. Suppliers describe 270 degree systems as having roughly a 13 inch turning area with about a 12.5 inch sewing area, which is what lets a shop stitch around onto the side panels rather than stopping at the front.
That number is a placement limit, not a marketing figure. Side hits, wrap-around text, and back-of-cap decoration all depend on how far the driver can turn. If a brand wants a logo on the front and a mark on the left side panel, the shop either has a wide angle setup or it runs two separate hoopings. Two hoopings means two registration events, and that is where common cap embroidery faults tend to show up.
Bill Thickness Decides What Gets Stitched at All
The bill is the clearest hardware wall on a cap. A constructed bill carries a stiff insert, and driving a needle through it repeatedly needs both motor torque and a frame that can present the bill correctly. Decorators are blunt about this: single-needle machines are not commercial machines and do not have the motor to puncture thick, rigid bills.
If bill embroidery is on the table, that question gets answered before artwork, not after. The alternatives are a soft or unstructured bill, a patch applied to the bill, or moving the mark to a panel. All three are fine outcomes. Discovering the limit after the file is built is not.
Why Your Digitizer Needs the Machine Details
Here is the part that surprises buyers. The same logo is not one file. It is a family of files, and which one you need depends on what is going to run it. A good digitizer asks about the machine before quoting. If nobody asks, that is worth noticing.
Color Sequence Changes
On a multi-needle machine the sequence can be optimized for stitch quality, because color changes are free. On a single-needle machine the sequence gets optimized for the fewest possible stops, even if that means a slightly less ideal stitch order. Those are different files that happen to look identical on screen. The same thinking applies to structured and unstructured cap bodies, where the body itself changes how much support the stitches receive.
Density Has to Match the Running Speed
A machine running slower on caps behaves differently from the same machine running flat. Thread tension, penetration, and fabric recovery all shift. Density and pull compensation get set with that in mind, which is also why underlay settings built for cap panels are not the same values a flat garment would get. Too little underlay on buckram and the top stitches sink. Too much and the panel stiffens and the needle starts breaking.
When a Design Has to Be Split
If the artwork is wider than the frame allows, the file gets split with deliberate break points. Split points belong between elements, never through a letter or a satin column. Choosing where to break is a judgment call about the design, and it interacts with other construction decisions like handling corners in a satin path and whether curved lettering on a cap front can hold its baseline across the break.
Speed Numbers and What They Mean in Production
Speed is the specification most often quoted and least often understood. It matters for cap work because the number on the brochure is not the number you will run.
Advertised Speed Versus Sustained Speed
Manufacturers publish flat-bed speeds. Tajima lists its Cap Frame 2 at a maximum of 1,000 rpm, dropping to 900 rpm at 4 mm. Machine reviewers make the practical point more directly: advertised flat speeds near 1,200 stitches per minute are not sustainable on caps, because the curve and the dense material force slower and more careful needle penetration. Some machines ship with dual profiles, roughly 1,200 for flat work and 850 for caps.
The useful way to read that is reliability over headline. A machine holding a steady 850 on caps without thread breaks is worth more than one claiming 1,200 that cannot finish a hat. For a buyer the lesson is the same, because quoted turnaround should assume cap speed, not flat speed.
Speed also interacts with raised work. Raised foam work on cap fronts runs slower again, since the capping stitches have to seal foam cleanly rather than simply cover fabric.
Pre-Production Checklist
Run this before artwork gets approved. Every item maps to one of the limits above, and each one is cheaper to answer now than after a file exists.
A Real Order, Broken Down
A Houston landscaping company came to us with 120 structured six-panel caps and a logo that had been working on polos for years. The logo was a stacked lockup, a tree icon above two lines of text, with five colors and a thin tagline. On a polo it measured 3.5 inches wide and 2.75 inches tall.
The shop running the caps had a fifteen-needle machine with a standard cap frame. Five colors were no problem. The height was. A 2.75 inch tall lockup does not fit the usable area of a cap front once you clear the bill seam and leave room at the crown. Scaling the whole thing down to fit would have pushed the tagline below the width where it can hold as readable stitching.
We rebuilt the layout instead of shrinking it. The tree moved to the left of the text rather than above it, the two text lines became one, and the tagline came off the cap entirely and moved to a left sleeve application on their jackets. The cap version landed at 4.1 inches wide and 1.9 inches tall, inside the frame field with clearance. Color count stayed at five. The shop ran the job at cap speed in a single hooping per cap, with no splits and no rethreading.
The important detail is the order of operations. Because the shop told us the frame field up front, the redesign happened once. Had we digitized the polo lockup as-is, the sample would have failed, the layout question would have come up anyway, and the client would have lost a week.
Who Builds These Files
USA Digitizing Pro has been building embroidery and vector files from a Texas studio since 2015. Hat machine embroidery is a large share of what comes through, which means we ask about your machine before we quote. Needle count, frame field, driver reach, and whether the bill is in play are all part of the intake.
Digitizing starts at $15 for designs under 5 inches and $25 for designs above 5 inches, with 2 to 4 hour turnaround and a money-back quality guarantee. Our cap digitizing work covers standard and wide angle setups, and 3D puff digitizing is available when the design calls for raised foam. You keep the production file either way.
Reach us at sales@usadigitizingpro.com or +1 (830) 321-7832.
FAQs About Hat machine embroidery
Partly. Soft and unstructured hats work in a standard flat hoop, often with a tear-away sticky stabilizer holding the panel. Structured caps are much harder, and a constructed bill is generally out of reach because a domestic motor lacks the force to punch through the insert repeatedly. If your work is mostly soft hats and patches, a regular machine is workable.
For structured caps, yes. You need a cap frame paired with a cap driver so the cap rotates under the needle. For soft hats a flat hoop plus sticky stabilizer handles most jobs, and specialty hoop clips can hold the bill clear of the sewing area.
It rotates the cap. Rather than moving a flat hoop around under the needle, the driver turns the cap itself so the stitching surface meets the needle squarely. That is the mechanical answer to the cap’s curve, and it is the single part that separates a hat machine embroidery setup from a flat one.
On a commercial machine with the right setup, yes. On a domestic single-needle machine, generally no, because a constructed bill is too thick and rigid for the motor. If bill decoration matters, confirm it with the shop before artwork is finalized. A bill patch or a panel placement are the common alternatives.
Multi-needle, if caps are a real part of your volume. Each manual color change on a single-needle machine is another chance for the cap to shift, and the single-point hoop attachment struggles with the weight of structured cap material. A ten or fifteen needle machine loads every color once and runs through.
As many as it has needles. Fifteen needles means fifteen colors without stopping. Going beyond that forces a rethread mid-run, which on a cap adds registration risk. Most well-built cap logos sit comfortably under six colors anyway.
Slower than the brochure. Tajima publishes 1,000 rpm maximum for its Cap Frame 2, dropping to 900 rpm at 4 mm, and reviewers note that flat speeds near 1,200 stitches per minute are not sustainable on caps. A steady 850 on caps is a realistic and healthy production figure.
Baby Lock lists its cap frame field at 2 3/8 by 5 1/8 inches, or 60 by 130 mm, and that is typical for a standard frame. Usable area is smaller once you clear the bill seam and the crown. Cap designs end up wide and short, so tall stacked layouts usually need rebuilding rather than resizing.
Structured caps already carry buckram, so the frame plus a suitable backing does the work. Soft hats and awkward shapes do well with a tear-away sticky stabilizer, which holds the piece without hoop pressure. Remove sticky stabilizer right after stitching and keep heat away from it while the fabric is still attached.
Usually flagging. The unsupported panel lifts as the needle rises, which moves the fabric before the stitch sets. Check the frame tension and the backing first. Stitch sequence is the second suspect, because cap files built center-out and bottom-up resist shifting better than files that run in artwork order.
The Machine Sets the Rules, the File Follows Them
Every constraint in this article is a number someone already published. Field size, needle count, driver reach, and bill thickness are not opinions and they do not negotiate. What makes hat work go smoothly is finding out those four numbers before the artwork is locked, not after a sample fails.
Ask your shop for the frame field and the needle count. Send both to whoever builds your file. That one email saves more revision cycles than any software setting ever will.
Follow Us

RELATED BLOGS
Transforming Designs With Digitizing Services: What Changes 2026
Published September 11, 2026 | By USA Digitizing Pro Team Somebody sends a logo, gets a stitched sample back, and the first.

Logo Digitizing for Small Businesses: 2026 Pricing Guide
A small business ordering its first embroidered logo usually has one question before anything else: what does this actually cost. Logo digitizing.